Video Guide
Step by Step Guide
Step 1: Download Your Website Template
- After purchasing the template, open the provided PDF file.
- Use the link in the PDF to access the Proton Drive page.
- Enter the password from the PDF to access the files.
- Download the template and save it to your desktop.
- Unzip the file by right-clicking it and selecting “Extract.”
Step 2: Create a GitHub Account and Install GitHub Desktop
- Go to the GitHub website and create an account if you don’t have one.
- Download and install GitHub Desktop.
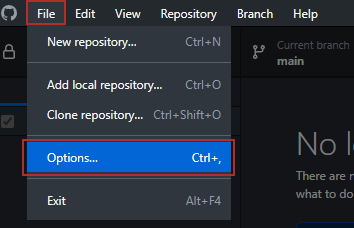
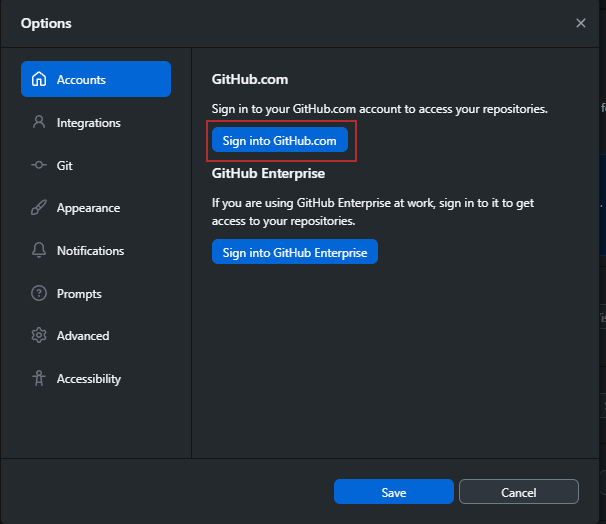
- Open GitHub Desktop and log in to your GitHub account by going to File > Options > Accounts > Sign into GitHub.
Step 3: Create and Publish a GitHub Repository
- In GitHub Desktop, click the dropdown menu to add a new repository.

- Then select Add > Create a New Repository.

- Give your repo a name and where you want to store it, then click Create Repository.

- Once you have created your new repo, click Publish Repository.

- Make sure you have checked Keep this code private, then click Publish Repository.

Step 4: Upload Your Template to GitHub
- Open the newly created repository folder on your desktop by clicking Show in Explorer.

- Copy the contents of the unzipped template into this folder.

- Return to GitHub Desktop, fill in the Summary field and Commit the changes.

- Then push them to GitHub by clicking Push Origin.

Step 5: Create a Netlify Account
- Go to the Netlify website and sign up for an account.
- Confirm your email and log in to the Netlify dashboard.
Step 6: Connect Your Site to Netlify
- In Netlify, in the menu go to Sites, you should then see the Add your site to Netlify, click Import from Git.
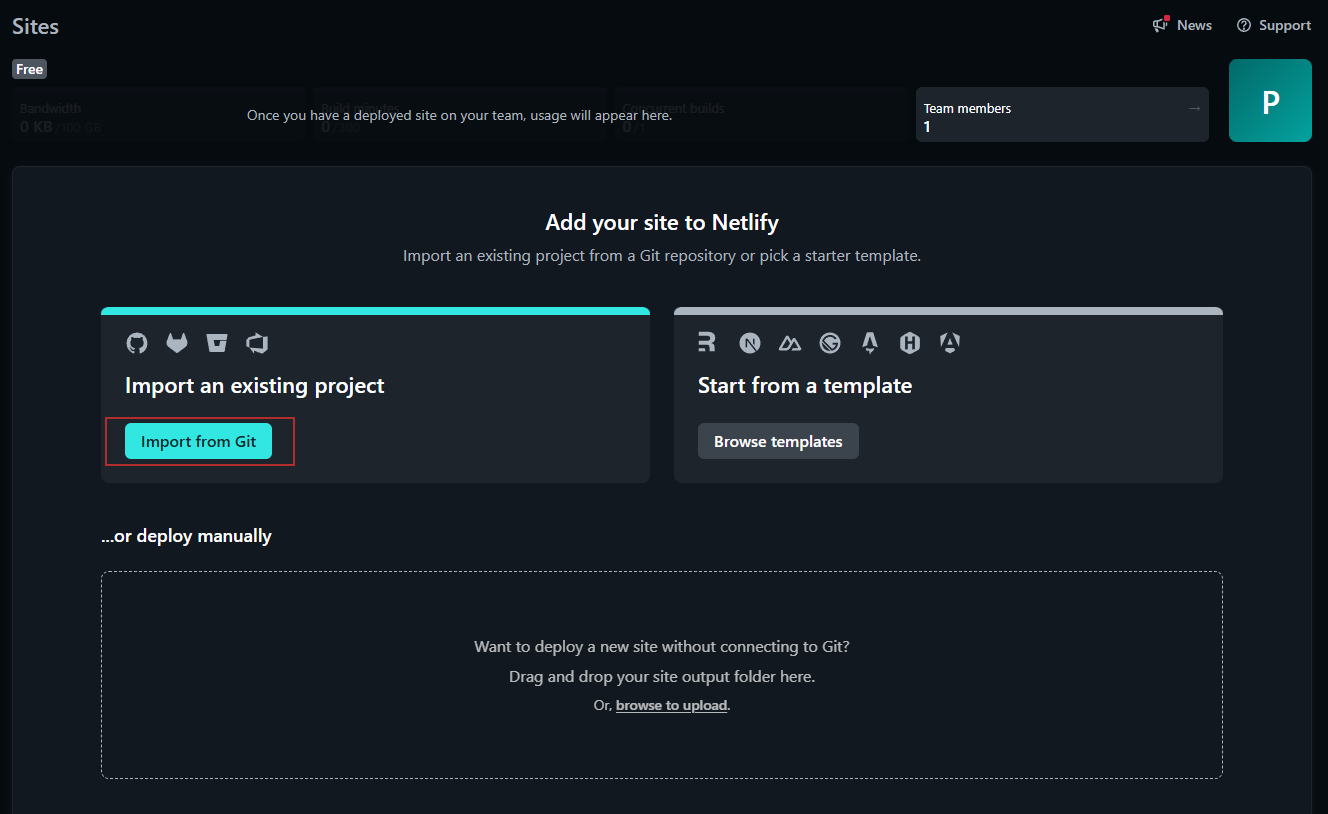
- We are going to deploy our project with GitHub.

- Now you need to select the Repository we just created and copied your site into.

- Give your site a name, this can be whatever you want.

- You need your build setting to look exactly like this:
-
In the Build Settings:
- Set the Branch to Deploy to main.
- Set the Base Directory to /.
- Set the Build Command to npm run build.
- Set the Publish Directory to /public.

- Then you can Deploy your site.

- You will see your site building in the Production Deploys box, it will then turn green with Published next to it.

- Your site is now live.
Step 7: Enable Netlify Identity.
- Go to the Site Configuration section in Netlify.
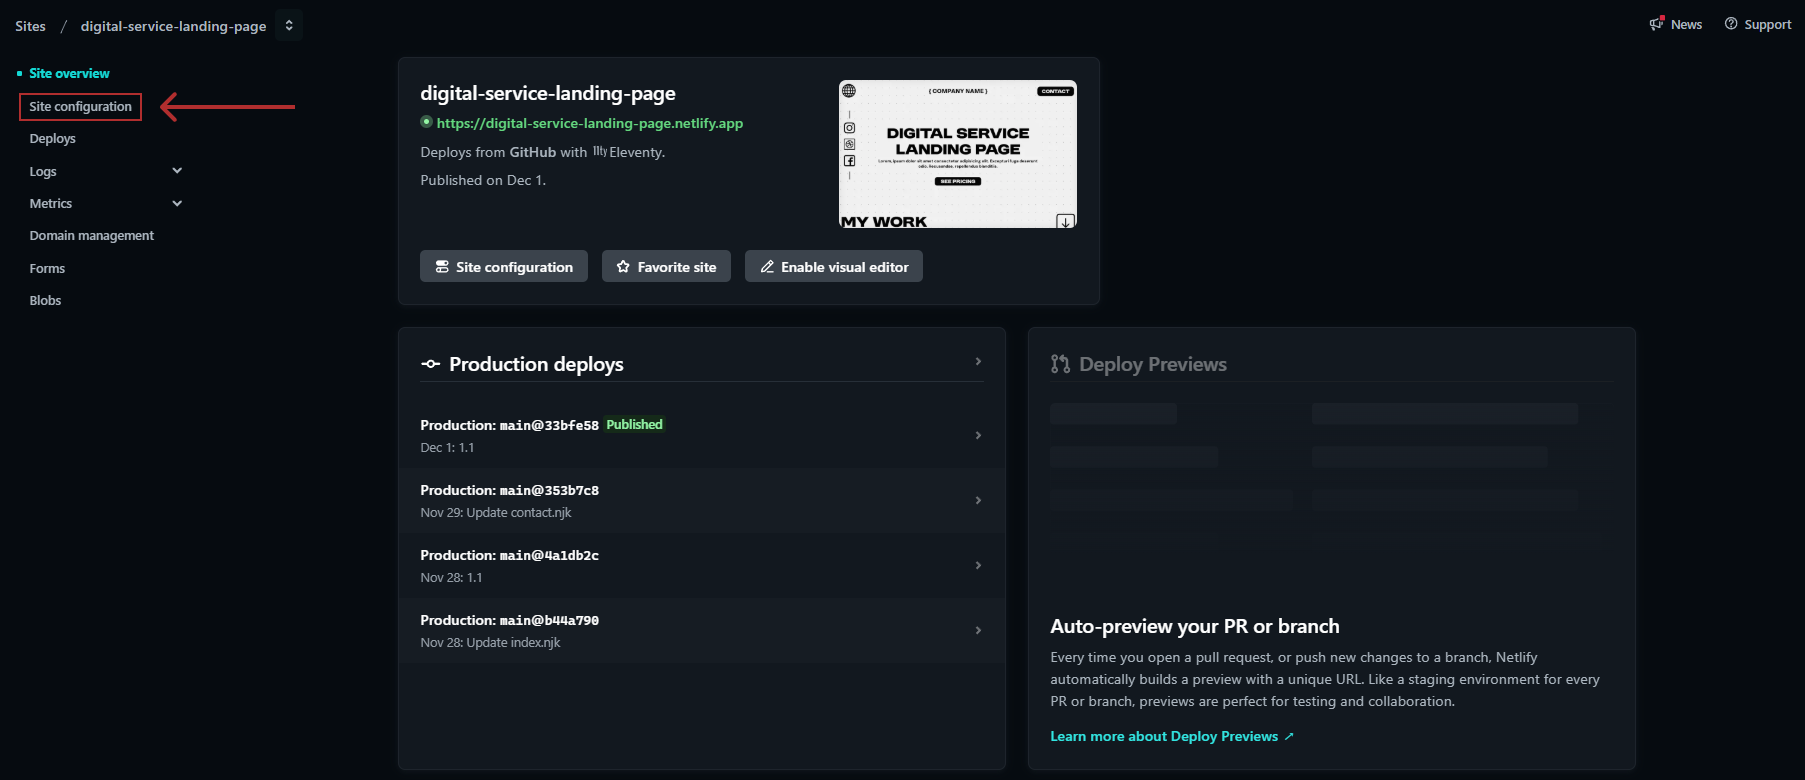
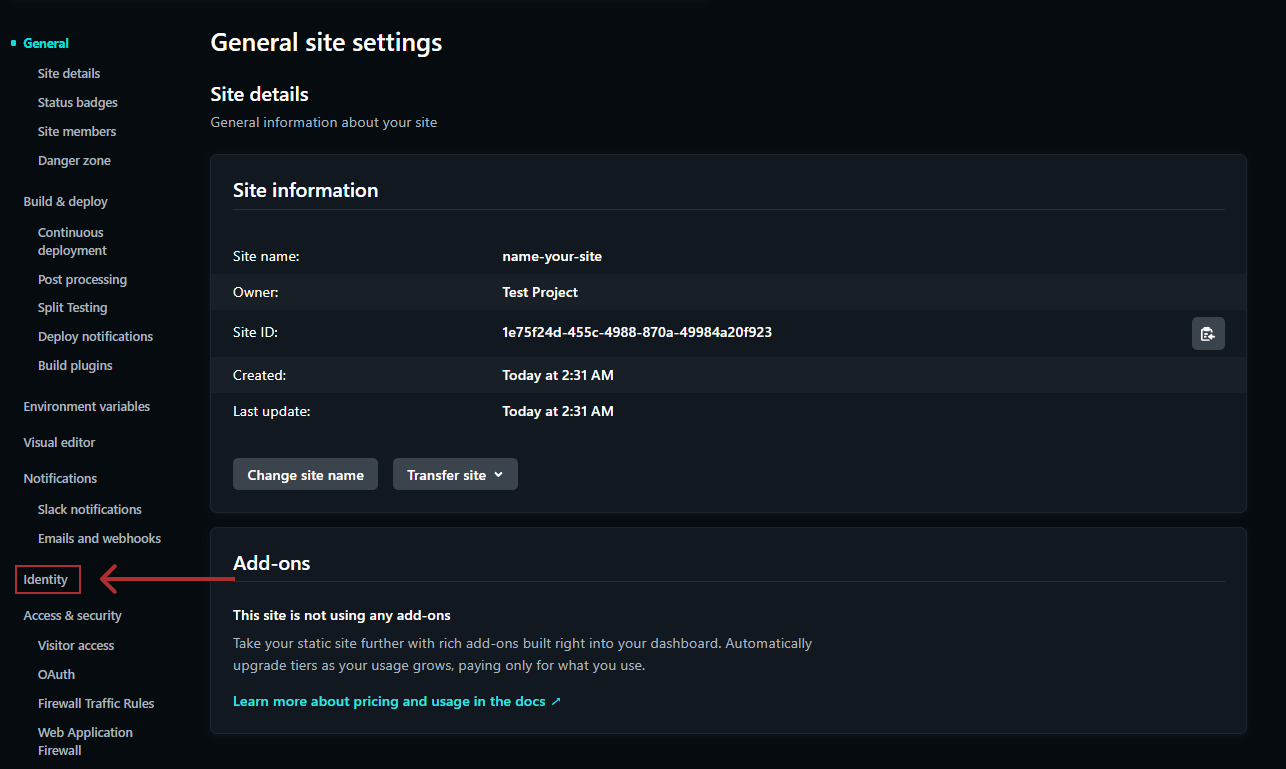
- Go to the Identity in the side menu.
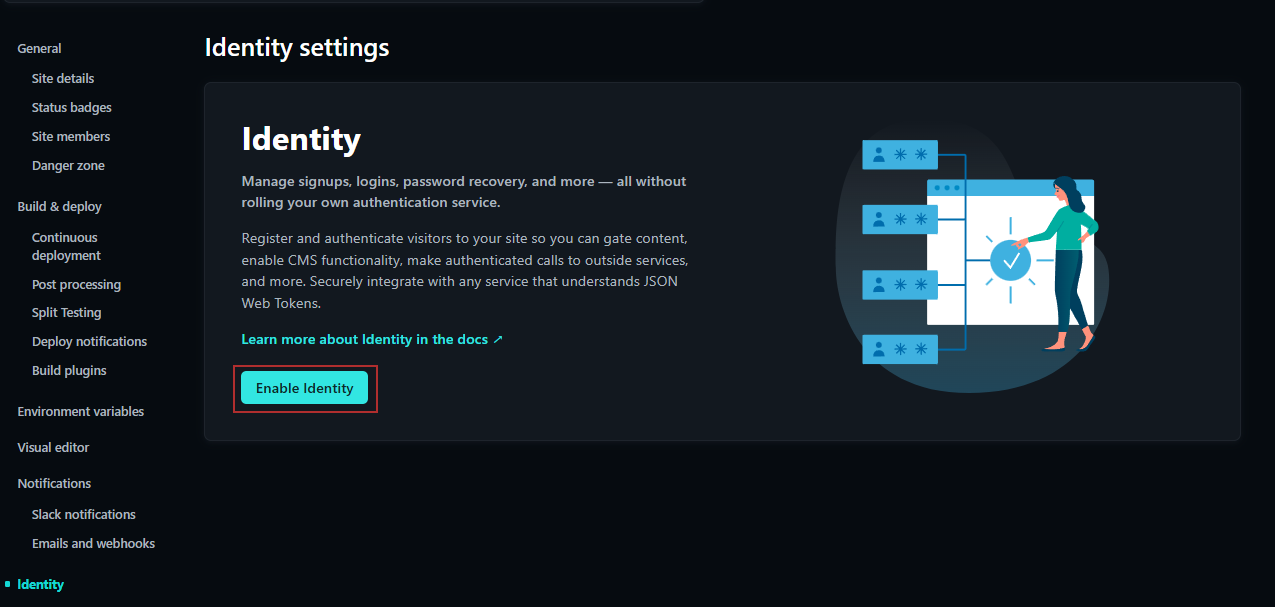
- Enable Identity.
Step 8: Configure Identity Settings
- Go to the Identity Setting page from the menu in the sidebar.
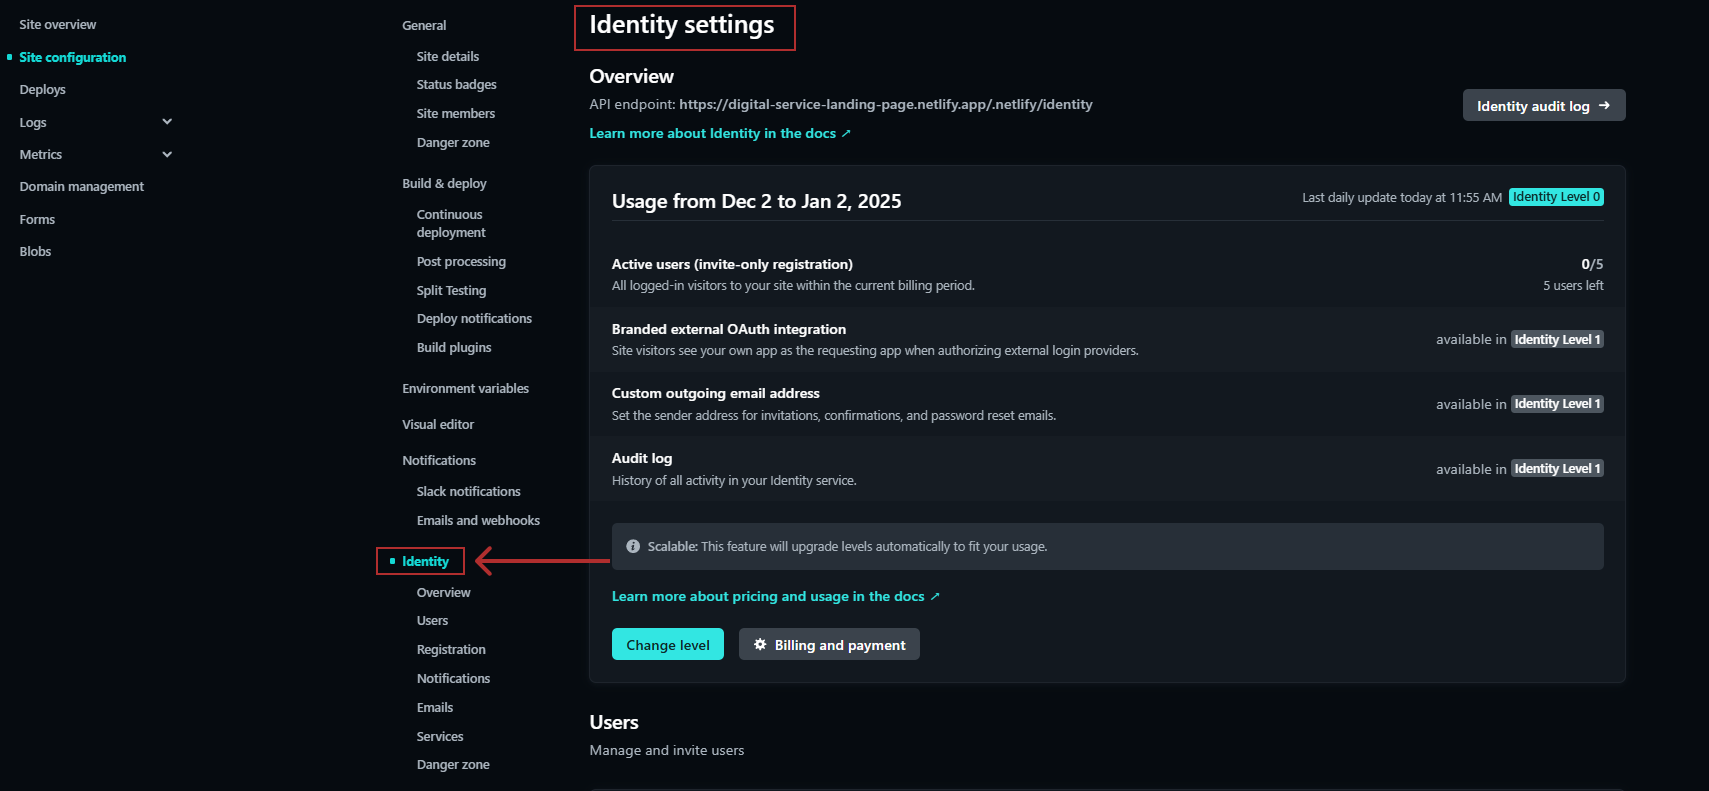
- Scroll down to the Registration settings
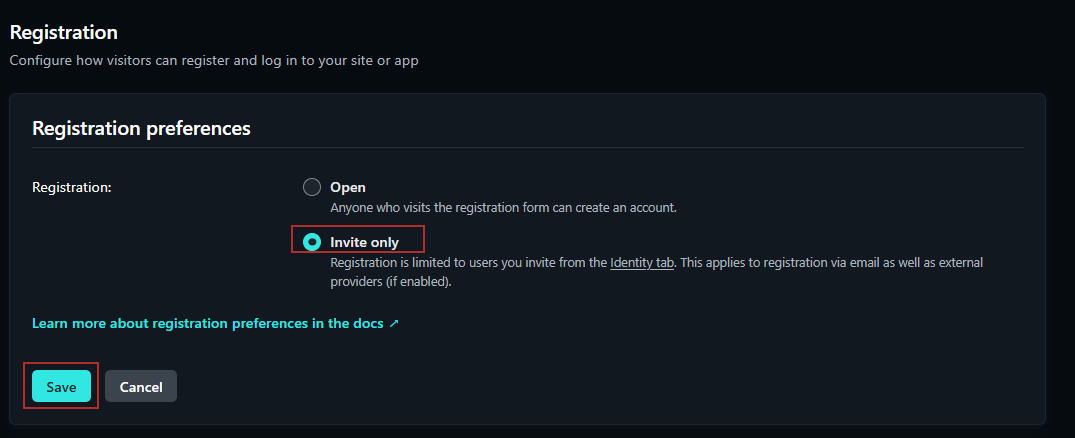
- First we will configure the Registration Preferences, change this to Invite Only.
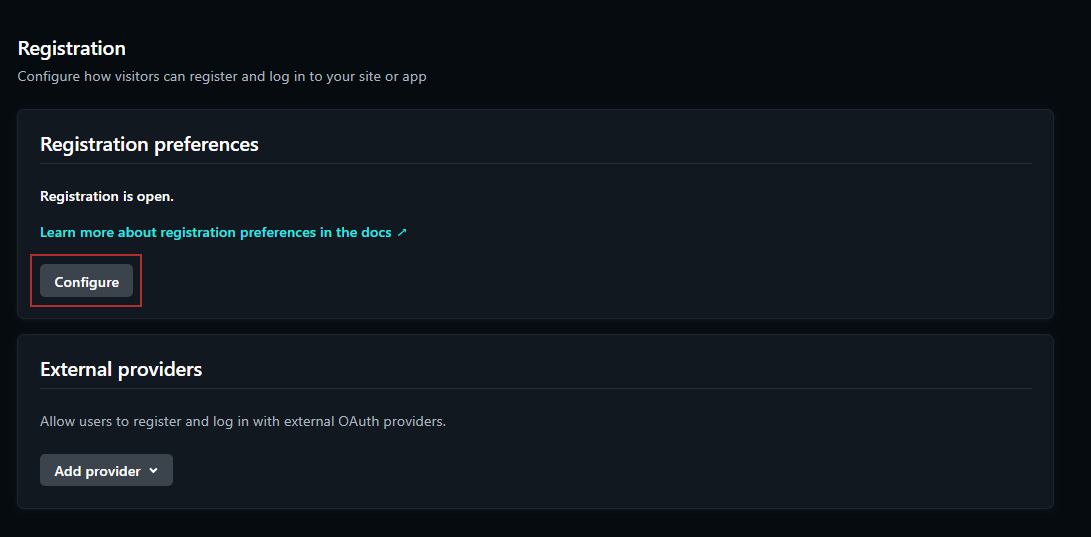
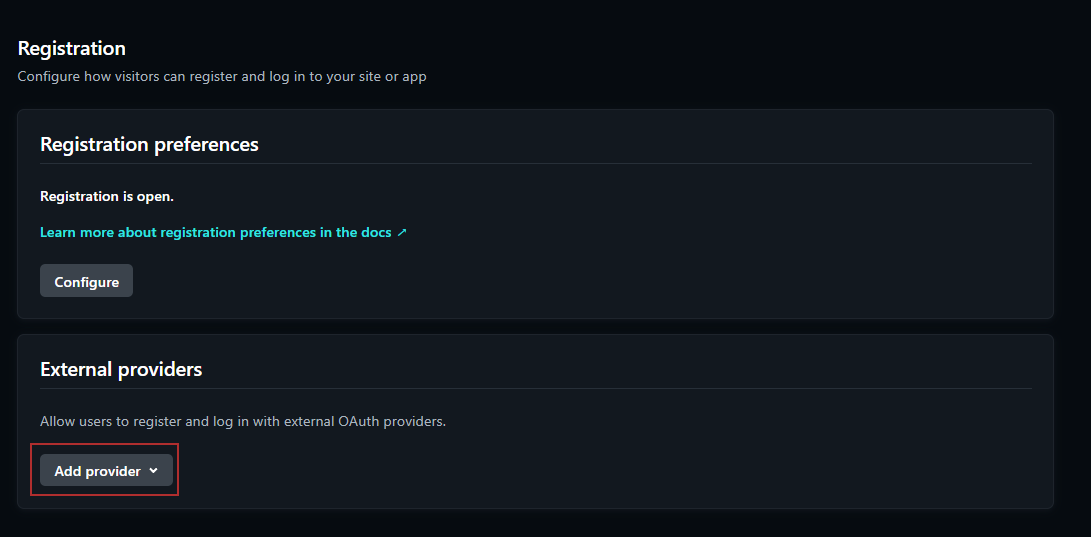
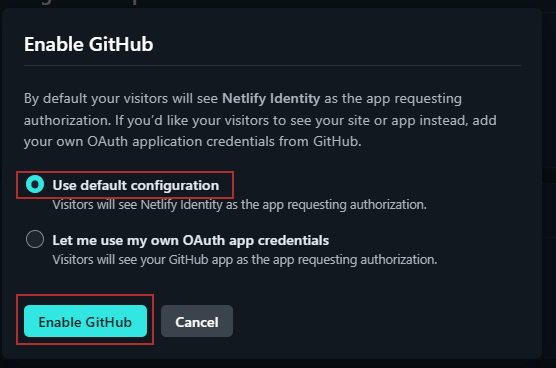
- Second we will configure External Provider, add GitHub here.

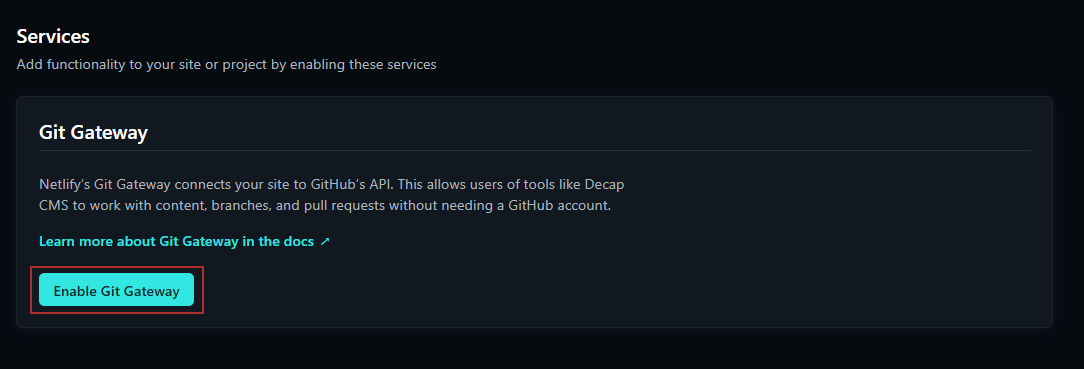
- Now still in the Identity Settings, scroll down to the Services settings and click Enable Git Gateway.
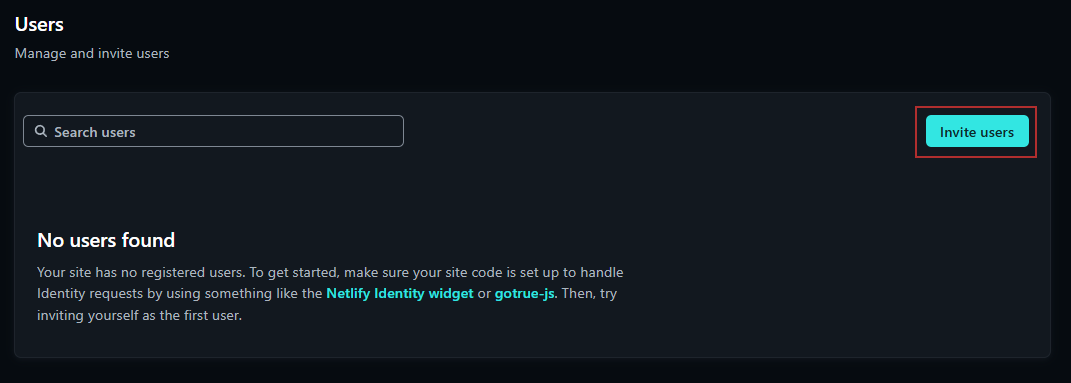
- Lastly in the Identity Settings, you need to invite yourself so you can login to the Admin setting of your website. Send an invitation to your GitHub email (the email address you used to create your GitHub account) from the Users settings.
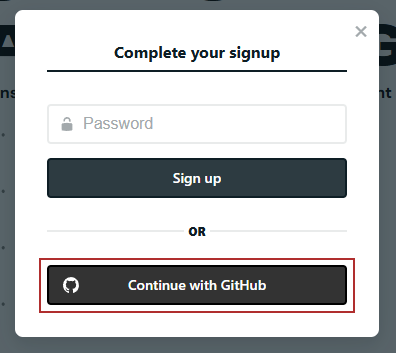
- Accept the invitation via email and log in with Continue with GitHub.
Step 9: Trigger a Netlify Update
- Access the CMS via your-site-url/admin.
- Make a minor change (e.g., add an exclamation mark) to any content.
- Publish the changes to trigger a rebuild of the site.
Step 10: Enable Form Detection
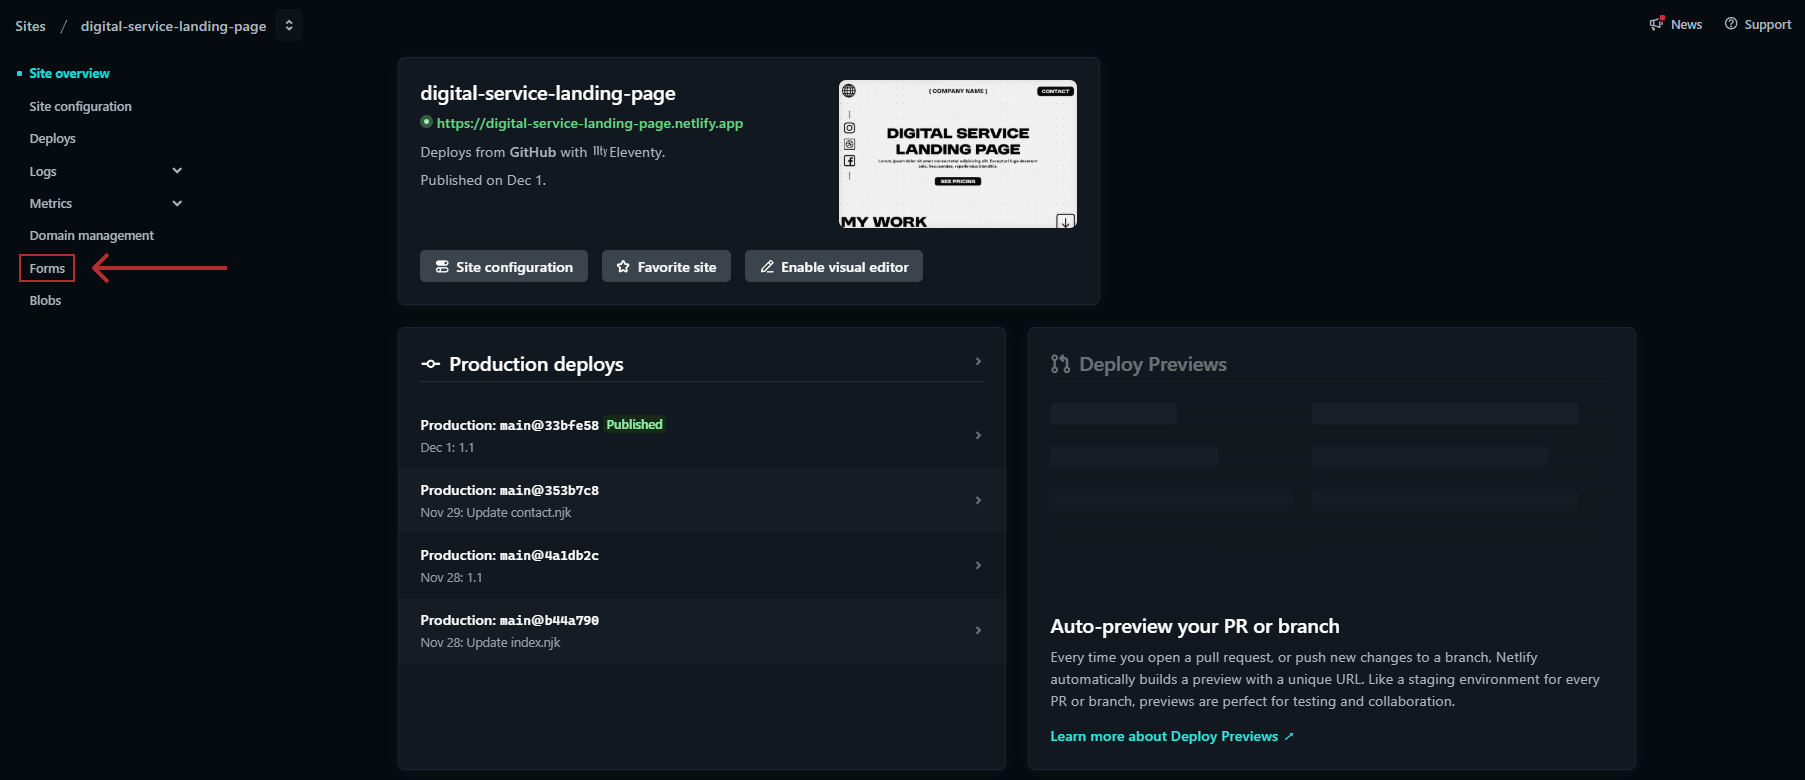
- Go to the Forms section in Netlify and click Enable form detection.

Step 11: Submit a test form to activate it.
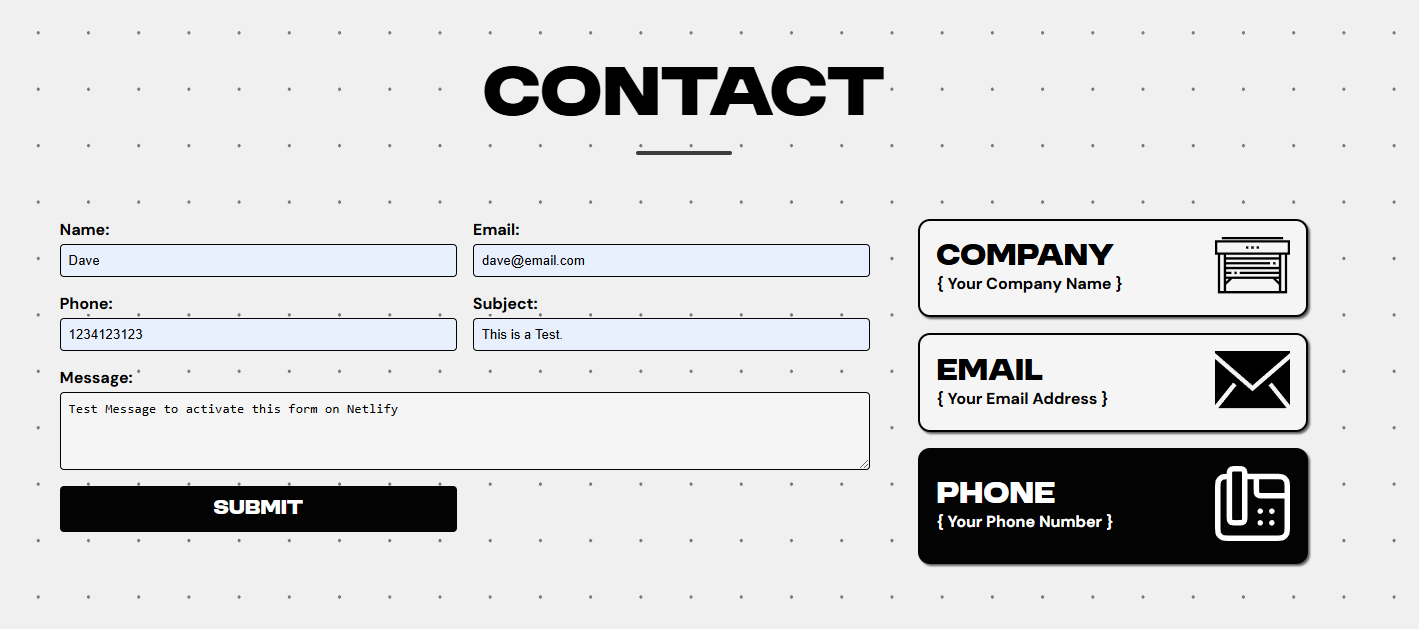
- Go to your site and send a test message to activate your sites form.
- Then you want to go back to the Form menu in Netlify and you should now see the ,Active Forms box.
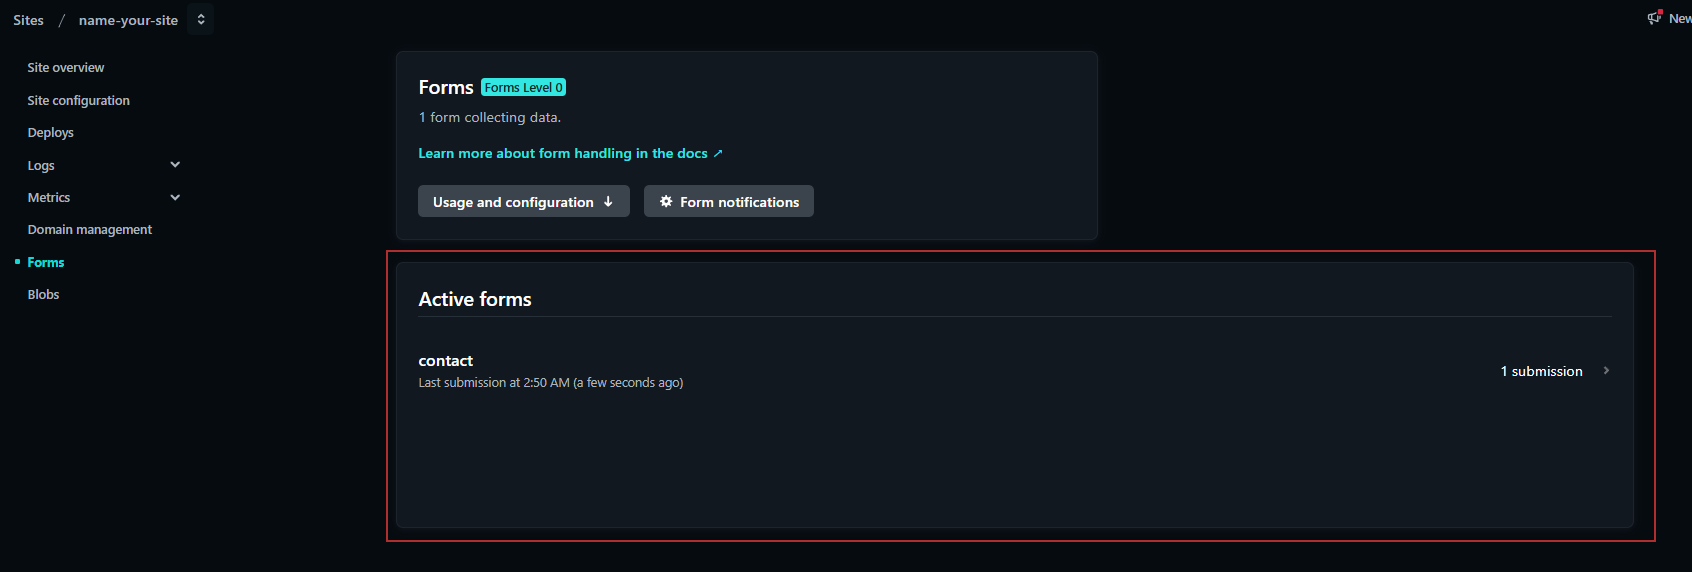
- *If you do not see this Active Form box, try hard resetting your site with ‘CTRL + F5’, and submit another form from your site. If you still do not see that Active Form box, then repeat step X and trigger another build of your site, then once your site is build, go to its live page, perform another hard reset, and submit another form.
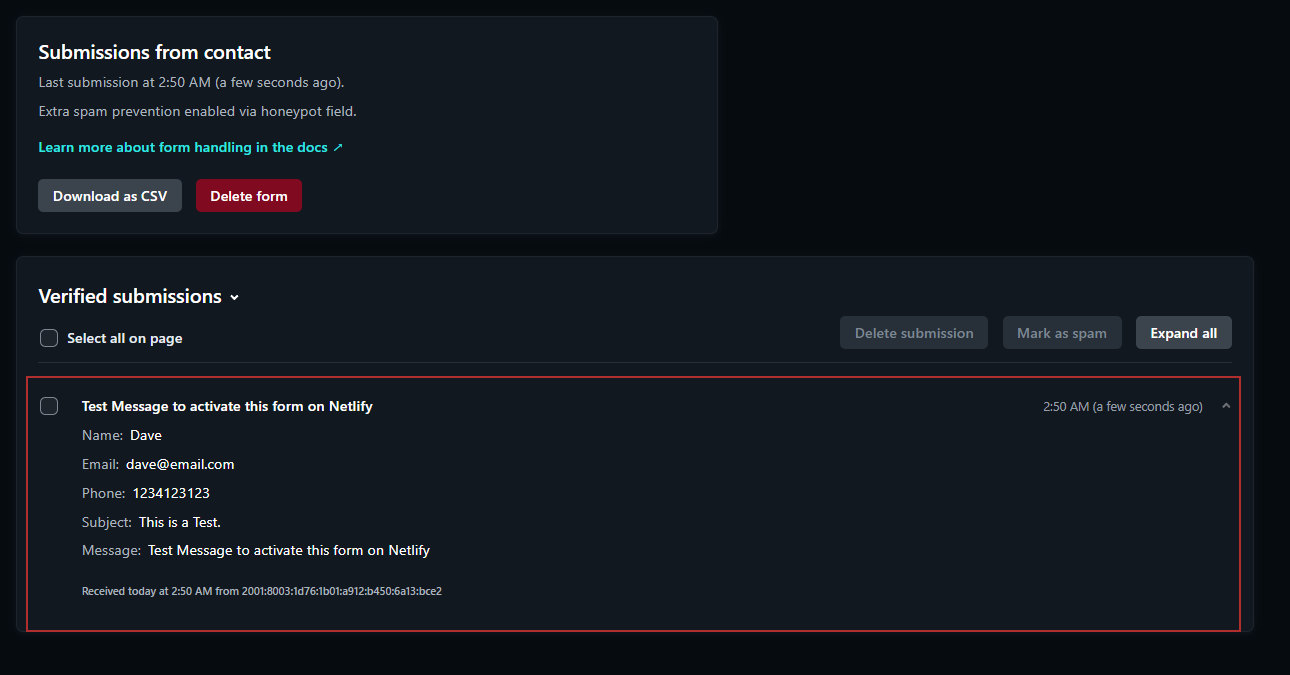
- Now you should have 1 submission, click on it and you should see the test message you just sent.
Step 12: Setup Email notifications for your Form
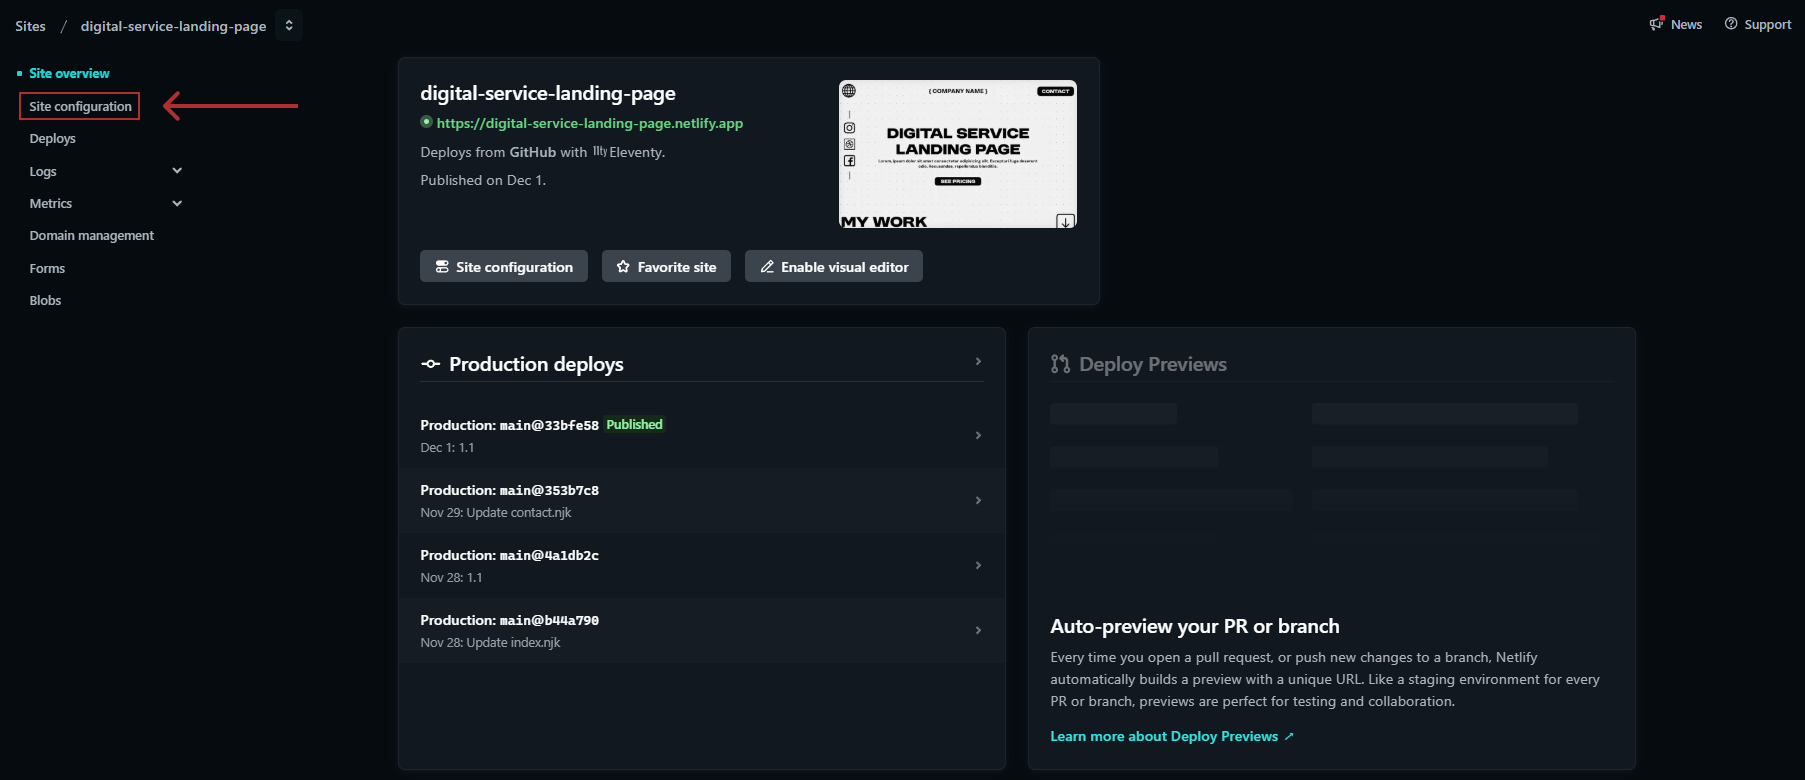
- Configure email notifications for form submissions in Site Configuration > Notifications.
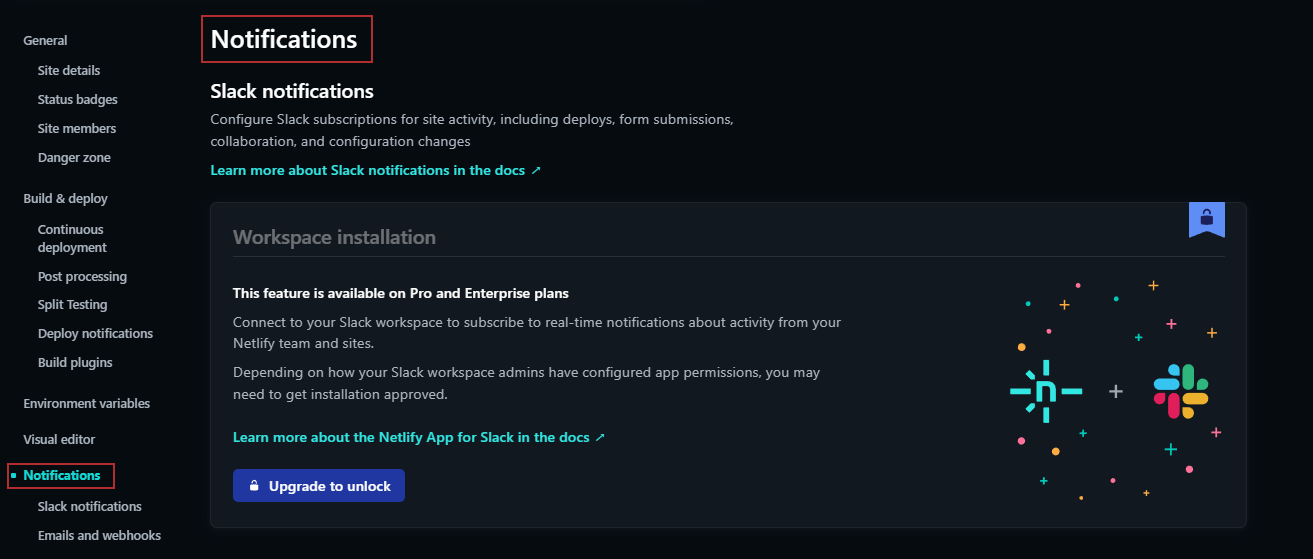
- Scroll down to the Emails & Webhooks section, and look for the Form Submissions Notifications.

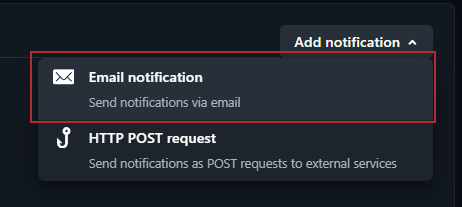
- Select Add notification > Email Notification.
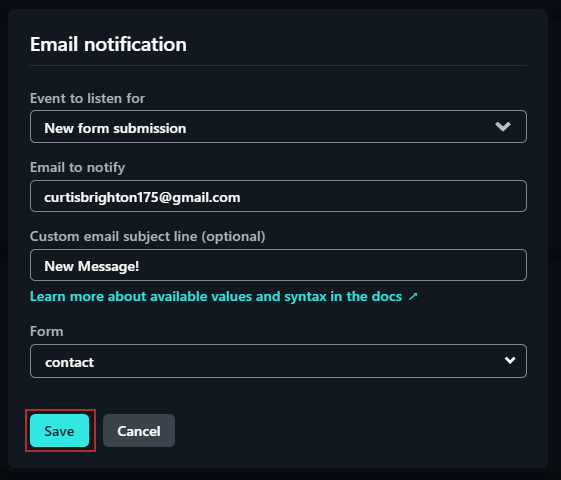
- Complete the form, you need to input the email you want the notification to go to.
Step 13: Setting up a Custom Domain
- In the sidebar menu for your site, go to Domain Management. Click Add a Domain.

- Enter in your Custom Domain you have purchased form a domain provider, it will tell you that its already registered, that means that its already registered with your provider. Click Add Domain.

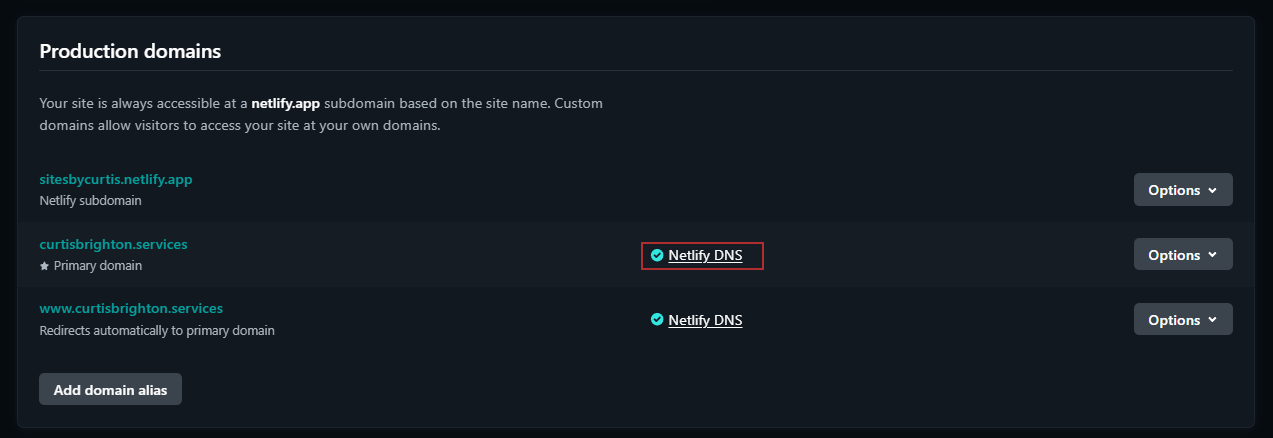
- Now on the Domain Management page in the Production Domains you will see your custom domain. Now click Options > Set up Netlify DNS.

- Click Verify.

- Click Add domain.

- You don’t need to change anything in the DNS Records, Netlify will do this for you. Click Continue.

- These are the name servers you will need to replace with your Domain Provider. Now you want to go to your Domain Provider and deleted any name servers in your custom domain, and replace them with these. This process will be different depending on who your provider is, below is resources for the 4 main domain providers, if yours is not on the list just google “ Your Domain Provider Name, how to edit name servers”.

-
Custom Domain Resources
- Namecheap: How to Change DNS For a Domain
- GoDaddy: How to Connect Godaddy Domain to Netlify
- Domain.com: How To Update Nameservers
- Bluehost: How to Change Your Name Servers
- After you have updated your name servers, your will see a tick next to Netlify DNS, note any change to your domain can take up to 48 hours to process.
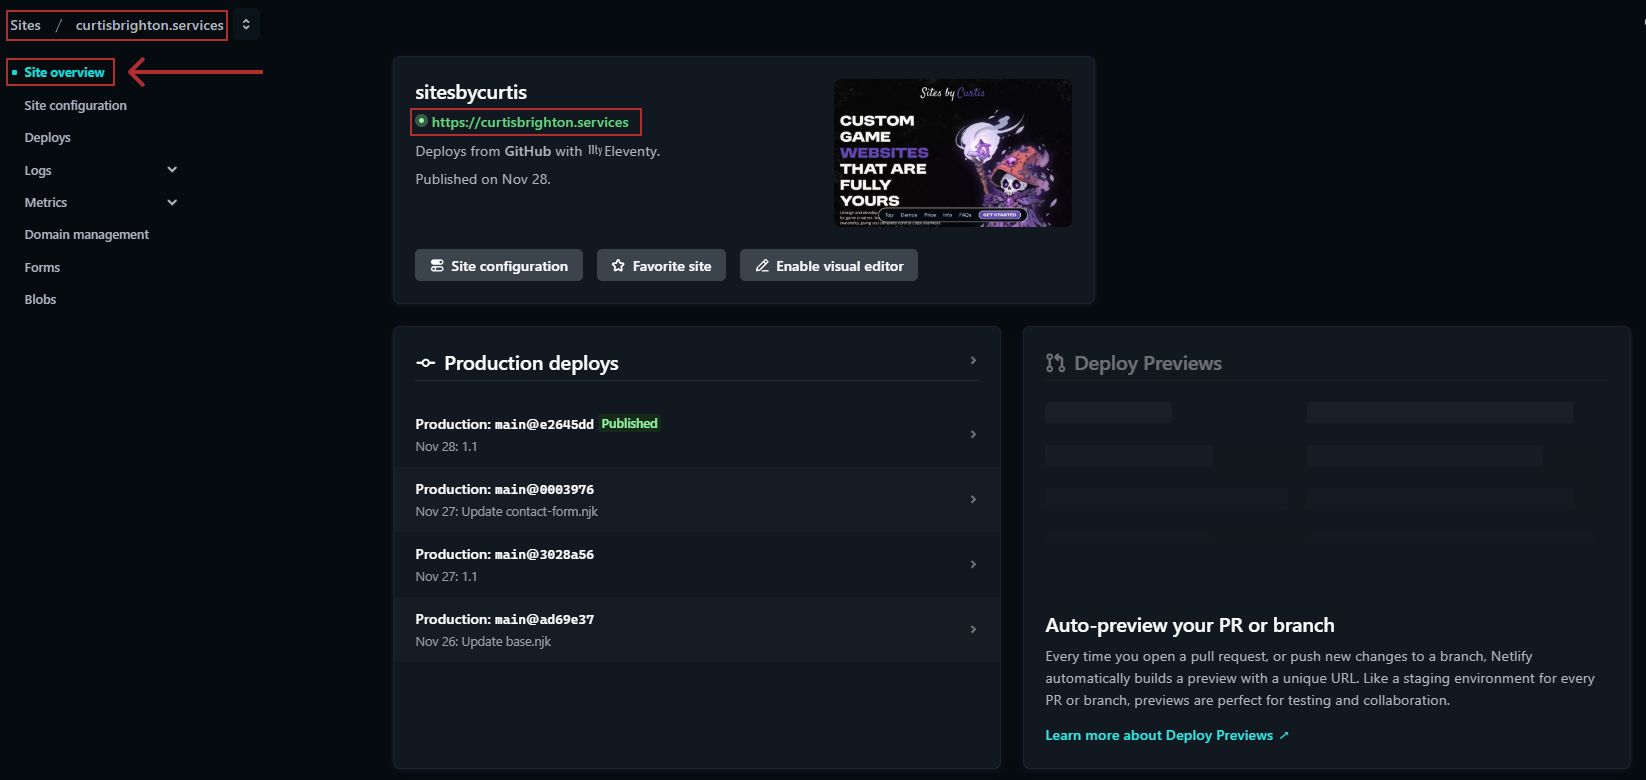
- Now you can go back to your Site Overview page, and you should now see your custom domain is displayed and working.
Your site is now all set up.